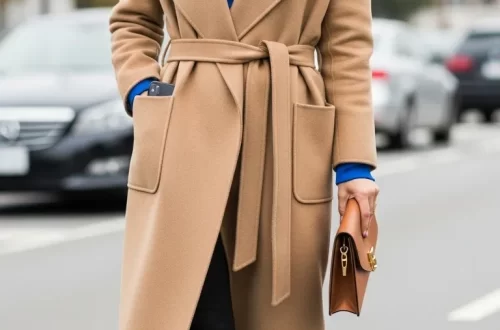
Staying warm is important. But nobody wants to feel like a stuffed marshmallow.
Adding too many clothes can hide your shape. It can make you feel bulky and clumsy. This is a common problem when the weather turns cool.

You want to be cozy. You also want to look stylish and sleek. How do you do both?
It is actually easier than you think. The solution is all about how you layer. It is about choosing the right pieces.
This guide has 36 smart ideas. We will show you how to layer like a pro, keeping you warm without the bulk.
1 The Sleek Cropped Vest

Adding a layer for warmth does not mean you have to add bulk. A cropped faux fur vest is a great solution. It fits close to the body and hits right at the waist. This keeps your core warm without covering up your shape.
You can wear it over a simple, fitted long-sleeve shirt. The contrast in textures between the soft vest and the smooth shirt looks stylish. This outfit element also defines your waistline. It pairs well with high-waisted pants for a clean, long look.
DIY Style Guide
- Step 1: Start with your base layer. Choose a thin, fitted long-sleeve shirt. Black or another dark, solid color works well.
- Step 2: Put on your pants. High-waisted trousers or jeans will connect with the bottom of the vest.
- Step 3: Add the main piece. Zip or button up your cropped faux fur vest. Make sure it sits nicely at your natural waist.
- Step 4: Finish with accessories. Simple hoop earrings are a good choice to complete the look.
2 The Sheer Skirt-Over-Pants Look

Want to add flair without heavy fabric? Try layering a sheer skirt over your leggings or fitted pants. This look is all about playing with different materials. The see-through fabric of the skirt adds a new dimension to a simple base.
It moves with you and creates an interesting shape. This method lets you re-imagine your summer skirts for cooler weather. It is a creative way to style an outfit and avoids any bulk at all.
DIY Style Guide
- Step 1: Put on your base layer. A plain, fitted long-sleeve top is a good start.
- Step 2: Pull on a pair of sleek pants. Leggings or faux leather pants work best.
- Step 3: Wrap the sheer skirt around your waist, right on top of the pants.
- Step 4: Secure the skirt. Make sure the opening and any angled hems are visible.
- Step 5: Add your shoes. Pointed heels or flats can complete this look.
3 The Cropped Knit Vest

A knit vest is a very smart way to layer. This one is cropped, which works well over a long dress. It brings warmth to your chest and back. The bright color also adds a pop of fun to the neutral dress underneath.
Because it is sleeveless, your arms are free. The look does not feel heavy. The zip-neck detail adds a sporty touch. A belt bag can be worn over it to define your waist.
DIY Style Guide
- Step 1: Start with your dress. A long, simple shirtdress is a great choice.
- Step 2: Put on your shoes. Platform sneakers give this outfit a casual feel.
- Step 3: Pull the cropped knit vest over your head. Let it sit at your natural waist.
- Step 4: Add a belt bag. Strap it around your waist, right where the vest ends. This helps show your shape.
4 The Retro Tee Layer

This is a classic trick that adds no bulk. Take your favorite graphic t-shirt. Now, wear it over a thin, fitted long-sleeve shirt. This creates a cool, retro style. It is very comfortable.
You get the warmth of a long-sleeve shirt. You also still get to show off your favorite tee. The trick is to keep the bottom layer very thin. This lets the top t-shirt hang normally.
DIY Style Guide
- Step 1: Put on the first shirt. This should be a thin, long-sleeve shirt. A solid color like grey or black is easy to match.
- Step 2: Pull your short-sleeve graphic t-shirt on over the long-sleeve one.
- Step 3: Adjust the shirts. Make sure the neckline and sleeves look neat.
- Step 4: Pair it with casual pants, like cargo jeans. Add a beanie for an extra style touch.
5 The Lightweight Long Cardigan

A long cardigan is a useful layering piece. You should choose one made from a thin, fine knit. This gives you a long, lean line without adding any width. It is a simple way to add some warmth.
You can wear it over a light camisole or a simple t-shirt. The length adds drama. The light fabric keeps it from feeling bulky. This look is great for many occasions.
DIY Style Guide
- Step 1: Start with a simple top, like a silk or satin camisole.
- Step 2: Put on your pants. Wide-leg ribbed pants are comfortable and stylish.
- Step 3: Slide on your long, lightweight cardigan. Leave it open in the front.
- Step 4: Add your accessories. A metallic bag and matching shoes make the outfit look put-together.
6 The Open Flannel Shirt

An open flannel shirt acts just like a light jacket. This is a very easy way to add a layer. Start with a basic fitted top, like a white ribbed tank or t-shirt.
Then, just add a flannel shirt on top. You can leave it completely unbuttoned. Roll up the sleeves for a relaxed feeling. This adds a pattern and some warmth without covering your silhouette.
DIY Style Guide
- Step 1: Put on your base shirt. A white fitted tank top or t-shirt is a simple start.
- Step 2: Add your favorite pair of blue jeans.
- Step 3: Put on your flannel shirt. Do not button it up.
- Step 4: Roll the cuffs of the flannel shirt up toward your elbows. This keeps it from looking sloppy.
7 The Popped Collar Sweater

This is a smart, preppy way to layer. Wear a collared polo shirt as your first layer. Then, pull a thin v-neck or polo-style sweater over it.
The key is to pull the collar of the bottom shirt out. Let it sit flat over the neckline of the sweater. This frames your face and adds interest. It provides extra warmth at the neck without any bulk on your body.
DIY Style Guide
- Step 1: Put on your first shirt. A collared polo shirt works very well.
- Step 2: Carefully pull your thin sweater on over the polo shirt.
- Step 3: Reach under the sweater and pull the polo shirt’s collar out.
- Step 4: Smooth the collar so it lies flat on top of the sweater’s neckline.
- Step 5: Pair with trousers or a skirt to finish the smart look.
8 The Built-In Layer Top

Sometimes the smartest way to “layer” is to not layer at all. Many tops are designed to look like multiple pieces. This shirt is a great example. It has cutouts and straps. This gives the illusion of a tank top under a sweater.
You get a complex, layered style with only one piece of clothing. This means you get zero added bulk. It is a clever design that solves the problem easily.
DIY Style Guide
- Step 1: This is the easiest one. Find a top that has “built-in” layers, cutouts, or straps.
- Step 2: Put the special shirt on.
- Step 3: Pair it with simple, solid-colored pants. This lets the interesting top be the main focus of the outfit.
9 The Mesh Turtleneck Base

A mesh turtleneck is a great layering tool. It is very thin, so it adds no bulk at all. You can find them in fun patterns or bright colors. This adds a lot of personality to a simple outfit.
Wear it under a plain slip dress. This changes the whole look of the dress. It makes a summer item ready for cooler days. You get warmth on your arms and neck without a heavy sweater.
DIY Style Guide
- Step 1: Put on your mesh top first. This is your base layer.
- Step 2: Carefully pull your slip dress on over the mesh top.
- Step 3: Smooth the dress so it hangs nicely.
- Step 4: Add a simple chain belt over the dress to show your waist.
- Step 5: Finish with big hoop earrings to match the bold look.
10 The All-in-One Bodysuit

This is another smart “fake” layering trick. A color-blocked bodysuit gives the look of multiple pieces. It might look like a shirt, a tank top, and a shaping layer. It is actually just one single item.
This piece fits close to your body. It creates a very smooth line under pants or skirts. You get a complex, athletic style with zero bulk. There is no fabric to tuck in or adjust.
DIY Style Guide
- Step 1: Choose a long-sleeve bodysuit that has a color-block design.
- Step 2: Put on the bodysuit. It should fit smoothly, like a second skin.
- Step 3: Pair it with simple bottoms. Biker shorts or leggings work well for an athletic look.
- Step 4: You are done. The bodysuit does all the style work for you.
11 The Waist-Defining Wrap

A thin wrap top or wide belt can change your silhouette. This outfit uses a simple t-shirt as a base. Then, a thin wrap-style top is added. It layers neatly over the shirt.
The wide green belt is part of the wrap. It ties at the waist. This highlights your shape. It is a very clever way to add color and definition without using a thick knit.
DIY Style Guide
- Step 1: Start with a simple base shirt, like a plain white t-shirt.
- Step 2: Put on a skirt or pants. A flowy white skirt is a good choice.
- Step 3: Add the thin wrap top over your shirt.
- Step 4: Take the attached belt and wrap it around your waist two or three times.
- Step 5: Tie the belt in a simple knot at your side.
12 The Classic Crewneck Combo

This is a timeless way to layer. Wear a collared button-down shirt. Make sure it is a thin material, like cotton. Then, pull a thin crewneck sweater over it.
This look keeps you warm. The sweater should be a fine knit, not a chunky one. Let the collar peek out of the top. You can also let the shirt hem and cuffs show at the bottom and wrists.
DIY Style Guide
- Step 1: Put on your button-down shirt. A striped one adds nice detail.
- Step 2: Button the shirt up.
- Step 3: Pull your thin crewneck sweater on over the shirt.
- Step 4: Adjust the collar so it sits neatly over the sweater’s neckline.
- Step 5: Push up the sweater sleeves. Let the shirt cuffs stick out and fold them back.
13 The Backward Cardigan

Here is a creative twist. Take a simple, fitted cardigan. Instead of wearing it normally, put it on backward. The V-neck now creates a beautiful open-back look.
The buttons run down your spine. This is an unexpected detail. It shows off your back and a delicate necklace. It works as a light layer without feeling bulky at all.
DIY Style Guide
- Step 1: Choose a thin, fitted cardigan. A v-neck style works best.
- Step 2: Put the cardigan on with the buttons in the back.
- Step 3: Button up as many buttons as you like. You can leave the top one or two open.
- Step 4: Add a “back necklace.” This is a chain that hangs down your back.
- Step 5: Pair with simple jeans or pants.
14 The Belted Button-Down

You can layer shirts without adding much bulk. This look uses a t-shirt as a base. Then, a button-down shirt is worn over it. This shirt has two different colors, which adds interest.
The key to this look is the belt. A thin belt over the shirt pulls in the fabric. It creates a waistline. This stops the button-down from looking big or shapeless.
DIY Style Guide
- Step 1: Start with a basic t-shirt.
- Step 2: Put your button-down shirt on over the t-shirt. You can leave the top button open.
- Step 3: Roll up the sleeves of the button-down shirt.
- Step 4: Take a thin belt. Fasten it around your natural waist, on top of the shirt.
- Step 5: Pair with skinny pants or leggings to balance the top.
15 The Knotted Cami

This look plays with 90s style. Start with a basic graphic t-shirt. Then, layer a simple camisole or slip top over it. This is a very light layer.
To add shape, grab the front of the camisole. Tie it in a small knot. This defines your waist. It also adds a cool, relaxed detail to the outfit.
DIY Style Guide
- Step 1: Put on your graphic t-shirt.
- Step 2: Wear your camisole on top of the t-shirt.
- Step 3: Put on a skirt or jeans. A silk skirt is a good match.
- Step 4: Gather some of the camisole fabric at your waist.
- Step 5: Tie the fabric into a small, neat knot. Adjust it until you like how it looks.
16 The Knit Shrug (Arm Warmers)

This is a very smart layering piece. It is basically just sleeves. This item is called a shrug or a bolero. It warms your arms and shoulders. It leaves your chest and stomach area free.
You wear it over a simple tank top. This gives you a layered look with almost no fabric. It is a great way to add color. It also lets you wear your favorite tank tops when it is not so warm.
DIY Style Guide
- Step 1: Put on your favorite tank top. A cropped tank top works well.
- Step 2: Put on your pants. High-waisted cargo pants or joggers are a good fit.
- Step 3: Slide the knit shrug on. Put one arm through each sleeve.
- Step 4: Adjust the shrug so it sits nicely across your shoulders and chest.
- Step 5: Add a simple choker necklace to complete the look.
17 The Cutout Bolero Top

This look combines two pieces to look like one. It uses a cutout knit bolero over a matching bodysuit. The bolero is very short, covering just the shoulders and arms. This adds warmth.
The bodysuit underneath is fitted. The cutouts on the bolero and the bodysuit line up. This creates a very modern, sleek style. It is a great way to layer in a way that is built into the outfit.
DIY Style Guide
- Step 1: Start with a high-neck, fitted bodysuit. One with side cutouts is a good choice.
- Step 2: Put on your high-waisted pants. Black trousers create a long, clean line.
- Step 3: Add the knit bolero or shrug. This piece only covers your arms and shoulders.
- Step 4: Make sure the bolero’s cutout lines up with the top of your bodysuit for a planned look.
18 The Preppy Shoulder Drape

Using a sweater as an accessory is a classic trick. It adds no bulk to your body. You just drape a sweater over your shoulders. Tie the sleeves loosely in the front.
This adds a pop of color and a preppy feel. It also means you have an extra layer ready if you get cold. It works very well over a crisp button-down shirt.
DIY Style Guide
- Step 1: Put on your favorite button-down shirt and jeans.
- Step 2: Take a thin sweater. A grey one with stripes is a nice touch.
- Step 3: Place the middle of the sweater on the back of your neck.
- Step 4: Drape the rest of the sweater over your shoulders, with the sleeves in front.
- Step 5: Loosely tie the sleeves in a single, simple knot at your chest.
19 The Utility Vest

A utility vest is a sleeveless layer that adds style, not bulk. This type of vest has many pockets. It adds a rugged, outdoorsy feel to a simple outfit.
You can wear it over a plain hoodie or a long-sleeve shirt. It sits on top of your clothes. It does not squeeze you. This lets you move easily. The vest itself is the main style piece.
DIY Style Guide
- Step 1: Start with a simple base, like a dark-colored hoodie.
- Step 2: Put the utility vest on over the hoodie. Leave it unzipped.
- Step 3: Fasten the clip or buckle at the chest to keep it in place.
- Step 4: Add a beanie that matches one of the colors in the vest.
- Step 5: Pair with cargo pants to complete the utility look.
20 The Open-Knit Sweater

An open-knit or mesh sweater is all about texture. The loose weave means it is not heavy or dense. It is very breathable. You can see the layers underneath.
This lets you play with color. A bright pink tank top under a dark sweater creates a cool contrast. You can also layer a long tank top underneath a shorter one. This creates lines without any bulk.
DIY Style Guide
- Step 1: Start with your base layers. Put on a long white tank top first.
- Step 2: Add a shorter, bright-colored tank top over the white one.
- Step 3: Pull your open-knit sweater on over both tank tops.
- Step 4: Adjust the sweater. Pull the neckline off one shoulder if you like.
- Step 5: Add a long necklace that hangs down in the center.
21 The Scarf Halter Top

A large silk scarf can become a top. This is a very creative, no-bulk layer. You wear it over a fitted turtleneck. The turtleneck acts as a warm base layer.
The scarf adds a beautiful pattern and color. It covers your front. This creates the look of a whole new shirt. It is held in place with a knot, adding a nice detail at the neck.
DIY Style Guide
- Step 1: Put on a thin, fitted turtleneck. Black is a good, simple base.
- Step 2: Take a large, square silk scarf.
- Step 3: Fold the scarf in half to make a triangle.
- Step 4: Place the flat edge of the triangle at your neck.
- Step 5: Tie the two top corners behind your neck. Let the rest of the scarf hang down in front.
22 The Corset Harness

A harness or corset belt is a pure style layer. It adds zero warmth. Its job is to completely change your silhouette. You wear it over a simple shirtdress.
The harness cinches in your waist. This creates an hourglass shape. It adds structure and an edgy detail to a basic dress. The combination of the soft dress and the structured harness is very striking.
DIY Style Guide
- Step 1: Put on a simple, long button-down shirtdress.
- Step 2: Place the corset harness around your middle. It should sit at your natural waist.
- Step 3: Tighten the laces or buckles so it feels snug, but still comfortable.
- Step 4: Adjust the shoulder straps so they sit flat.
- Step 5: Add a choker necklace and combat boots to match the edgy style.
23 The Triple Collar Stack

This look is a master class in thin layering. It combines three light pieces. The base is a bright orange turtleneck. This adds a pop of color at the neck.
A white collared shirt goes over that. Its collar is popped. A grey zip-neck sweater goes on top. Its collar is also popped. This creates three visible layers at the neck. The rest of the body has only thin layers.
DIY Style Guide
- Step 1: Put on your thinnest layer, the bright turtleneck.
- Step 2: Add a thin, white button-down shirt. Leave the top buttons undone.
- Step 3: Pull on your thin, ribbed zip-neck sweater. Zip it down halfway.
- Step 4: Pop the collar of the white shirt so it sticks out.
- Step 5: Make sure all three necklines (turtleneck, shirt, sweater) are visible.
24 The Sheer Tee Overlay

This is a very subtle way to layer. It uses two t-shirts. The base is a plain, solid white t-shirt. It fits normally.
A second t-shirt, made of a very thin or sheer grey fabric, is layered on top. This top has a wider, scooped neckline. It adds a hint of color and a soft texture. It does not add any real bulk.
DIY Style Guide
- Step 1: Start with your basic white t-shirt.
- Step 2: Put the sheer, scoop-neck t-shirt on over the white one.
- Step 3: Pair with simple white jeans for a clean, light-colored outfit.
- Step 4: Add a few simple, layered necklaces. They will show nicely against the two necklines.
25 The Detachable Denim Vest

A denim vest is a timeless layering item. This one has a modern twist with sleeves that can be zipped off. This lets you choose your level of warmth. You can wear it as a full jacket or a simple vest.
It looks great over a soft, grey hoodie. This mixes a classic street-style piece with a comfortable basic. The vest adds structure to the soft hoodie. It keeps your core warm without making your whole body feel bulky.
DIY Style Guide
- Step 1: Start with your favorite cozy hoodie. A plain grey one works well.
- Step 2: Pull the hood of the hoodie out so it is ready to be on top.
- Step 3: Put the denim vest on over the hoodie. Button or zip it up.
- Step 4: Make sure the hoodie’s hood is lying flat on top of the vest’s collar.
- Step 5: Pair with cargo pants or jeans for a complete casual look.
26 The Unstructured Blazer

A normal blazer can feel stiff and heavy. This version is different. It is an “unstructured” blazer. This means it is made from a soft, flowing fabric. It does not have shoulder pads or a stiff lining.
It drapes open in the front and has no buttons. This makes it feel very light. It is a simple way to make a t-shirt and jeans look more polished. It adds style without the bulk of a traditional jacket.
DIY Style Guide
- Step 1: Put on your favorite plain t-shirt. A white one is a simple base.
- Step 2: Add your favorite blue jeans and a simple belt.
- Step 3: Slide on the soft, unstructured blazer. Let it hang open.
- Step 4: Gently push the sleeves up toward your elbows for a relaxed style.
- Step 5: Finish with simple flat shoes, like loafers.
27 The Distressed Tee Stack

This is a bold look that plays with many layers. All the layers are very thin, so they build texture instead of bulk. The base is a simple, grey long-sleeve shirt.
On top of that are several distressed, or ripped, shirts. Each one is a different color and a different length. This creates a deconstructed, punk-inspired style. It is a very creative way to mix colors and textures.
DIY Style Guide
- Step 1: Start with your thinnest shirt, the long-sleeve grey one.
- Step 2: Put a colorful tank top over it (like the pink one).
- Step 3: Add a second, shorter t-shirt over that (like the neon yellow one).
- Step 4: Add a final, very cropped and ripped t-shirt on top (like the black one).
- Step 5: Pair with ripped jeans and a studded belt to complete the look.
28 The Sheer Shirtdress Overlay

This is a very dramatic way to layer. It uses a long, sheer shirtdress as a top layer. Because the fabric is see-through, it adds a pattern without adding any weight. It has a button-front and cuffs, just like a regular shirt.
You can wear it over a simple white slip dress. It can also be worn over a white tank top and pants. This piece completely changes your base outfit.
DIY Style Guide
- Step 1: Put on your base outfit. A simple white dress or skirt set works well.
- Step 2: Add your shoes. Combat boots are a good contrast to the sheer fabric.
- Step 3: Carefully put the long, sheer shirtdress on over your base clothes.
- Step 4: Button up the sheer dress. You can leave the bottom few buttons open.
- Step 5: Add a simple necklace that peeks through at the collar.
29 The Thin Puffer Vest

A puffer vest is a smart way to stay warm. It keeps your core (your chest and back) insulated. When your core is warm, your whole body feels warmer. This vest is thin and lightly quilted. It is not a big, bulky version.
It fits neatly over a hoodie or a knit sweater. The bright orange zipper adds a nice pop of color. This is a very practical way to layer for a hike or a cool day.
DIY Style Guide
- Step 1: Put on your base layer. A hoodie is a comfortable choice.
- Step 2: Pull the hood out.
- Step 3: Put the thin puffer vest on over the hoodie.
- Step 4: Zip up the vest. Make sure the hood is on the outside.
- Step 5: Add a beanie and cargo pants that match the colors.
30 The Long Sleeveless Duster

This is a great piece for adding drama. A duster is a long, light coat. This one is sleeveless, which removes all the bulk from the arms. It is also made of a very lightweight, flowing fabric.
It hangs open and moves with you when you walk. It can be worn over something as simple as a t-shirt and shorts. It makes a basic outfit look much more intentional and stylish.
DIY Style Guide
- Step 1: Start with a simple base outfit. A plain t-shirt and shorts work.
- Step 2: Put on your shoes. Simple flat sandals are a good choice.
- Step 3: Put on the long, sleeveless duster. Let it hang open.
- Step 4: Add some accessories, like long layered necklaces, to fill the open space.
31 The Pointelle Knit Henley

This top is a layer all by itself. It is a “pointelle” knit. This means it is made with tiny decorative holes, like lace. This makes the fabric very light and breathable.
It is warmer than a t-shirt but much thinner than a sweater. It is slightly see-through. You can wear a simple black bralette or camisole underneath. This creates a nice contrast that shows through the pattern.
DIY Style Guide
- Step 1: Choose a simple, dark-colored bralette or tank top.
- Step 2: Put the pointelle henley on over it.
- Step 3: You can leave the top few buttons undone.
- Step 4: Pair it with black pants or jeans. This lets the texture of the top be the main focus.
32 The Utility Belt Bag

This layer is an accessory. It is a utility belt that has multiple pouches attached. It is a stylish way to carry your things without a purse. It adds no warmth, only style.
You wear it over a simple dress or a long top. It buckles at the waist. This is a great way to cinch your waist and give a simple dress a new shape. The colorful sleeves on the dress add a sporty touch.
DIY Style Guide
- Step 1: Put on a simple, long top or a t-shirt dress.
- Step 2: Put on a pair of plain leggings.
- Step 3: Buckle the utility belt around your natural waist, on top of the dress.
- Step 4: Adjust the pouches so they sit in the front.
- Step 5: Add your phone or keys to the pouches.
33 The Hoodie and Blazer Mix

This look combines two very different vibes. It takes a casual, soft hoodie and pairs it with a structured blazer. This high-low mix is very popular. It is a smart way to dress down a formal jacket.
The key is to use a slightly oversized blazer. This leaves plenty of room for the hoodie. It prevents any pulling or bunching. The hood peeks out over the blazer’s collar. This is the most important part of the style.
DIY Style Guide
- Step 1: Start with your favorite hoodie. A simple grey one is a great base.
- Step 2: Put the hoodie on and pull the hood out.
- Step 3: Put on your blazer. A black or faux leather one adds a sharp contrast.
- Step 4: Make sure the hoodie’s hood is resting nicely on top of the blazer’s collar.
- Step 5: Add a simple necklace that sits just under the hood.
34 The Deconstructed Sweatshirt

This is a very clever piece of clothing. It looks like two or three layers. It might seem like a leather vest or jacket over a sweatshirt. It is actually one single item.
The large leather collar and cuffs are attached to the sweatshirt. This gives you a very bold, high-fashion look. You get all the style of layering. You get none of the heat or bulk.
DIY Style Guide
- Step 1: Find a special sweatshirt that has built-in details, like a large collar or different sleeves.
- Step 2: Put the sweatshirt on.
- Step 3: Pair it with simple, matching black pants. This makes the top the main focus.
- Step 4: Add small, simple earrings. The shirt’s collar is the main accessory.
35 The Zipper-Reveal Tunic

A long tunic sweater is cozy. It can sometimes feel like a lot of fabric. This one has a smart design. It includes a long zipper on the side.
You can unzip it from the hip down. This creates a long slit. It shows off the layer underneath, like your jeans. This breaks up the solid fabric. It also makes it much easier to walk.
DIY Style Guide
- Step 1: Put on your favorite pair of blue jeans.
- Step 2: Add a simple grey tank top.
- Step 3: Pull your long tunic sweater on over your jeans.
- Step 4: Find the side zipper. Unzip it as high as you want.
- Step 5: This shows your jeans and the grey shirt, adding dimension.
36 The “Over-Sweater” Cami

This look turns layering upside down. Usually, a camisole goes underneath. In this style, it is worn on top of a thin sweater. This is a very fashionable choice.
It lets you show off a pretty lace cami. It also adds a new texture to a simple knit. It is a great way to use summer clothes in cooler weather. The key is to use a thin, fitted sweater.
DIY Style Guide
- Step 1: Put on your thin, fitted knit sweater.
- Step 2: Add your favorite jeans.
- Step 3: Carefully put your lace camisole on over the sweater.
- Step 4: Adjust the straps. Make sure the lace lies flat.
- Step 5: Add a simple gold necklace to finish the look.
See? Layering does not have to be bulky. You do not need to choose between warmth and style. You can have both.
The main trick is to be clever. Use thin fabrics. Play with textures. Use accessories to create shape.
You now have 36 new ways to try this. Go into your closet. Look at your clothes in a new way. You might be surprised at the new outfits you can create.
Key Takeaways
- Think Thin: Multiple thin layers are always warmer and less bulky than one thick layer.
- Use Vests: A vest keeps your core warm, which is the most important part.
- Play with Texture: A sheer top or an open-knit sweater adds style without any weight.
- Use Accessories: Belts, harnesses, and scarves can create a waistline over any outfit.
- Try “Fake” Layers: Look for single shirts that are designed to look like multiple pieces.